UPS Return Portal
Dear customer, welcome to our Cerascreen Return portal process powered by UPS. This is the easiest way to return your test sample from within the EU to our lab. Please follow the six easy steps below so that we can return your result as fast as possible.
Step 1: Start of the Return Process
- Open -http://www.cerascreen.com/return
- Select your country of your residence from the dropdown menu
- Write your name and family name
- Write the respective test ID
- Solve the captcha
- Click on the next button
Step 1: Start of the Return Process


Remark: Your Test ID will be checked with our database.You can find it on your Test ID Card in the kit or already in your Mobile or Web APP / User Profile.
Step 2: Address Validation
- Enter your address correctly
- Please pay attention to verify your email address as the details to print the label will be sent to this address in the process
- Click on the next button
Step 2: Address Validation


Step 3: Finished Successfully
- The following screen (see below) will be shown in your browser.
- In the meantime, you will receive an email. If you don’t get an email your email address in Step 2 “Address validation” was wrong or has a typo. It might also happen that the message from UPS got stuck in your Spam Folder. Please check.
Step 3: Finished Successfully


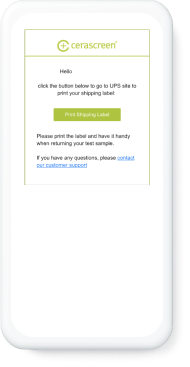
Step 4: Incoming email
- You will receive an EMail in which you should click the button “Print Shipping Label”
Step 4: Incoming email


Step 5: A new window from UPS opens up
- Option 1: “Print Label” - please don’t tag “Print to a Thermal Printer” (instead you really have one available) and print the label.
- Option2: “Send a digital copy of your package label to your inbox for later” to use the wallet function on the mobile phone. With this label on your mobile phone you can enter the next UPS shop and they print the label for you and stick it on the package starting the process.
Step 5: A new window from UPS opens up


Step 6: Pack it up
- Put your samples in the box.
- Seal the box with the sticker coming with the test kit.
- Stick the UPS label on the box.
- Drop it off at the next available UPS station.
Easy and simple. Now you can even track the package on it’s way back to us.


